How to configure the email flow in Google Workspace Admin Console
If you prefer automatic configuration, use EasyFooter auto-installer:
Automatic Google Workspace configuration
Summary
- Access the Google Workspace Admin console
- Create Host (used by compliance rule)
- Create Compliance rule (Gmail → EasyFooter routing)
- Limit routing to specific user or groups (optional)
- Define SMTP Relay (EasyFooter → Gmail routing)
1. Access Google Workspace Admin console
Access the Google Workspace Admin console
Make sure you log in with your Google Workspace Super Admin credentials.
2. Create Host
Host is used by a compliance rule to route your emails to EasyFooter cloud for processing.
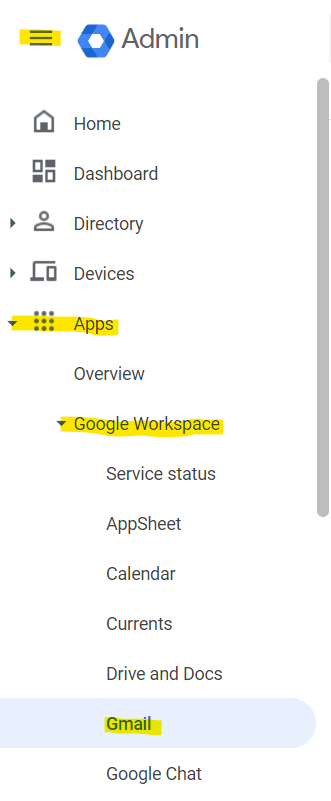
On the left side menu, select Apps then Google Workspace and Gmail
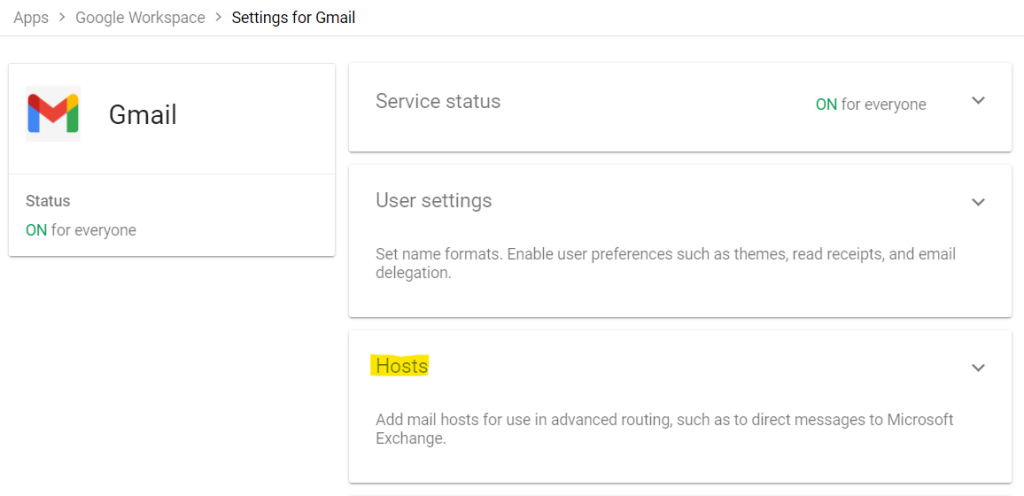
From the list of all Gmail settings, expand Hosts
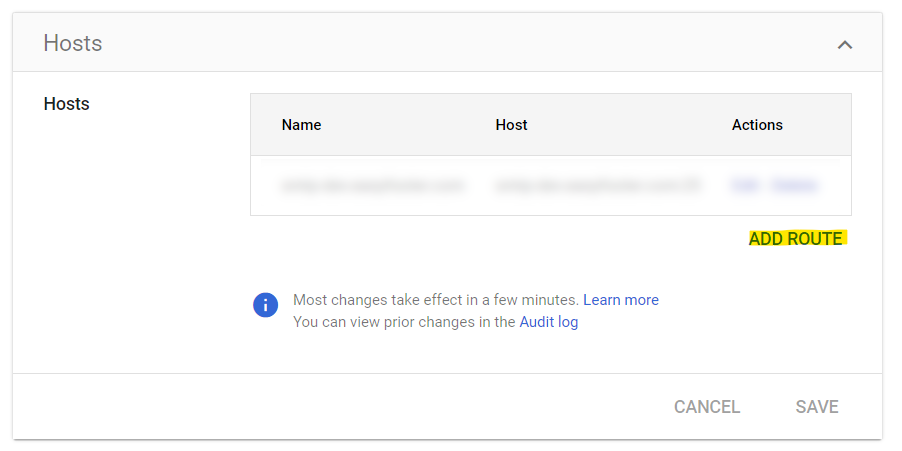
Click ADD ROUTE
The Add mail route window is displayed.
- In Name, enter the name of the route: EasyFooter
- Select Single host, then enter the host name:
smtp-<region code>.easyfooter.comAvailable region codes:
| eu | Europe |
| us | United States |
(also displayed on the EasyFooter portal/Configuration/EasyFooter SMTP Server Address)
You can also find this value in your EasyFooter portal settings.
- Then enter 25 as the port number for the host configuration.
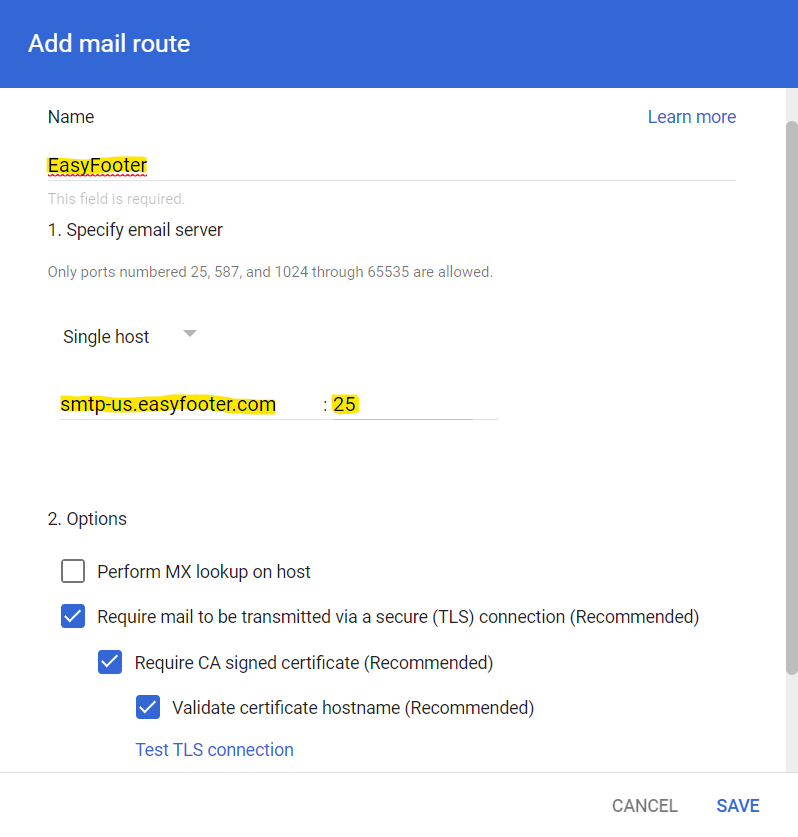
In the Options section, make sure following checkboxes are selected:
- Require mail to be transmitted via a secure (TLS) connection (Recommended)
- Require CA signed certificate (Recommended)
- Validate certificate hostname (Recommended)
Click SAVE.
3. Create Compliance rule
Compliance rule decides which emails are routed to EasyFooter cloud, and which were already processed and can be sent to actual recipients.
On the left side menu, select Apps then Google Workspace and Gmail
From the list of all Gmail settings, scroll down and expand Compliance
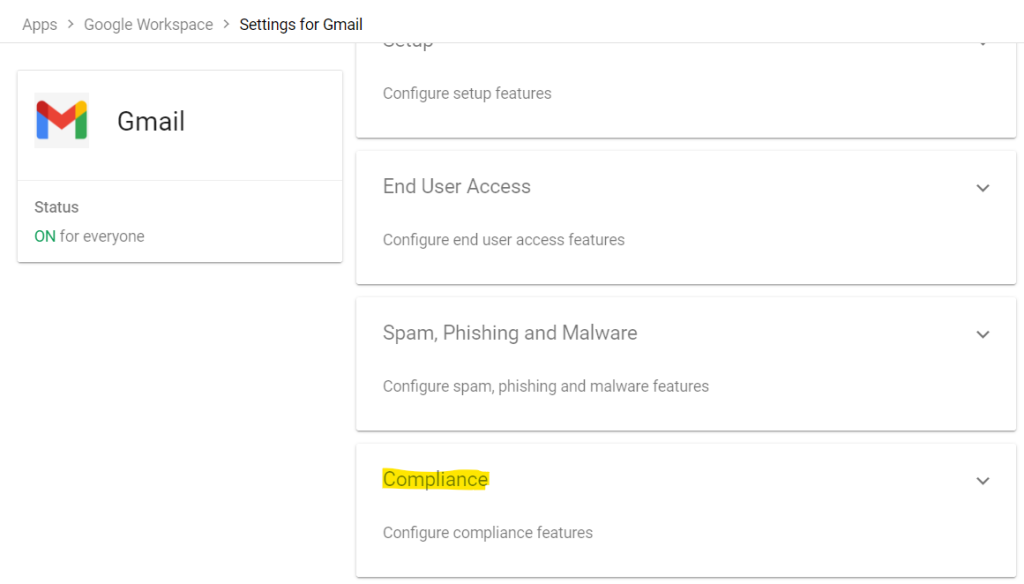
Scroll down to Content compliance section and click CONFIGURE to configure a new content compliance policy:

The Add setting window is displayed.
- In Content compliance, enter Route to EasyFooter
- Ensure Outbound and Internal – Sending are checked
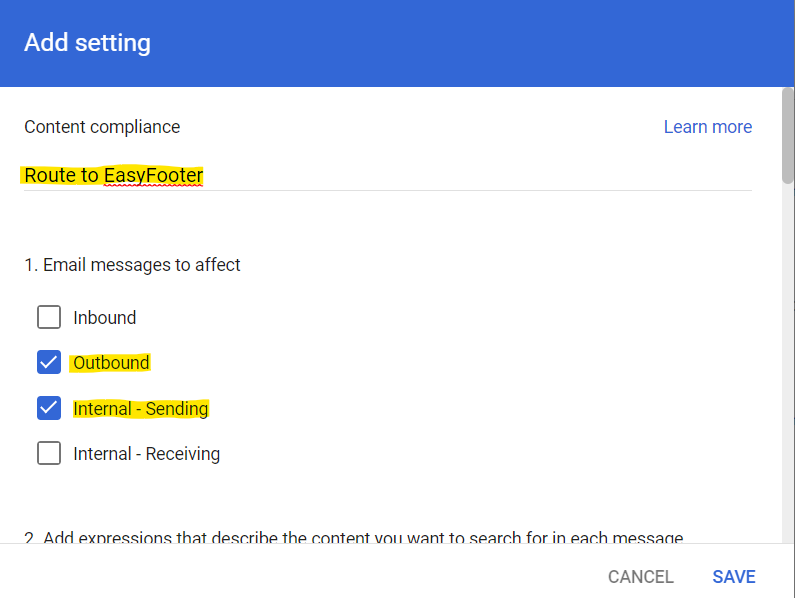
Click Add to add an expression that specifies which messages are processed by EasyFooter cloud.
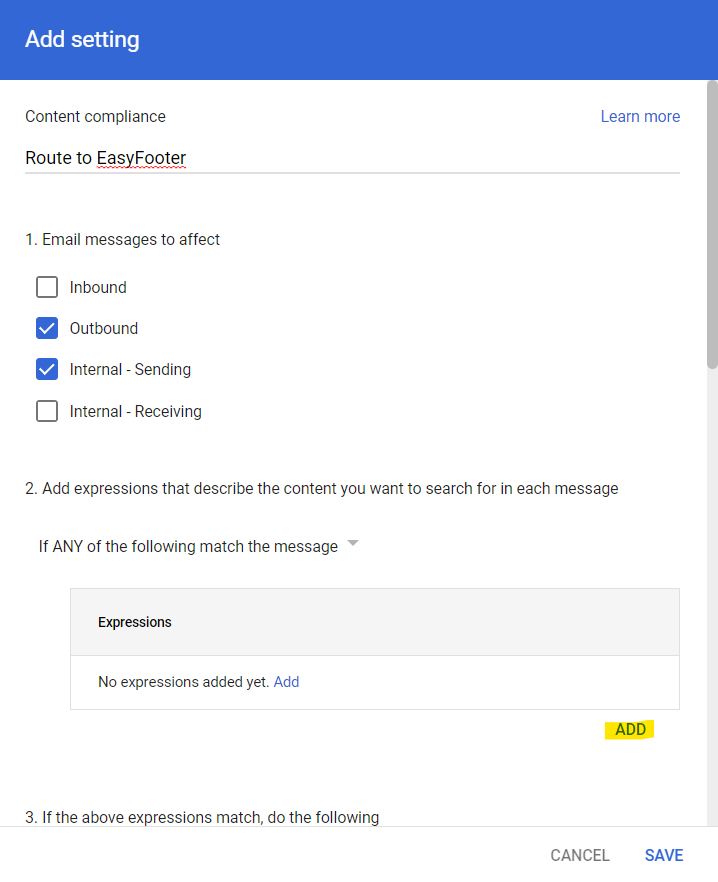
Add setting windows is displayed.
- From the Simple content match drop-down, select Advanced content match.
- From the Location drop-down, select Full headers.
- From the Match type drop-down, select Not contains text
- In Content, enter: X-EasyFooterSignature
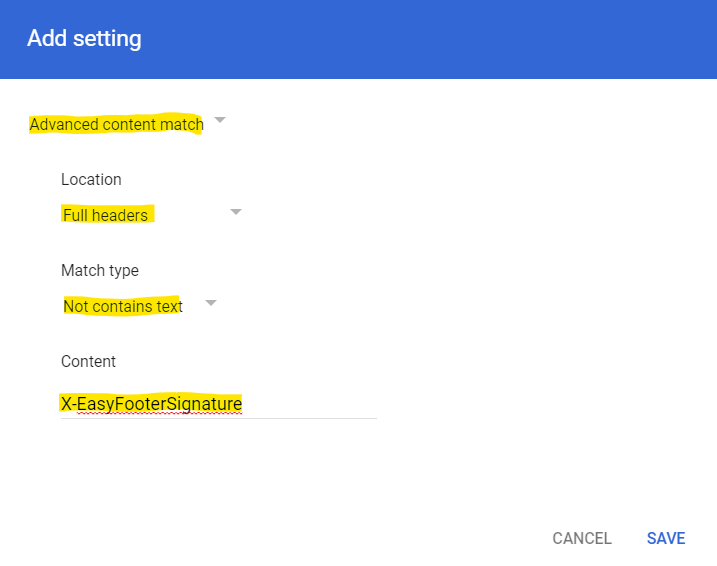
Click SAVE to return back to the Compliance Add setting window:
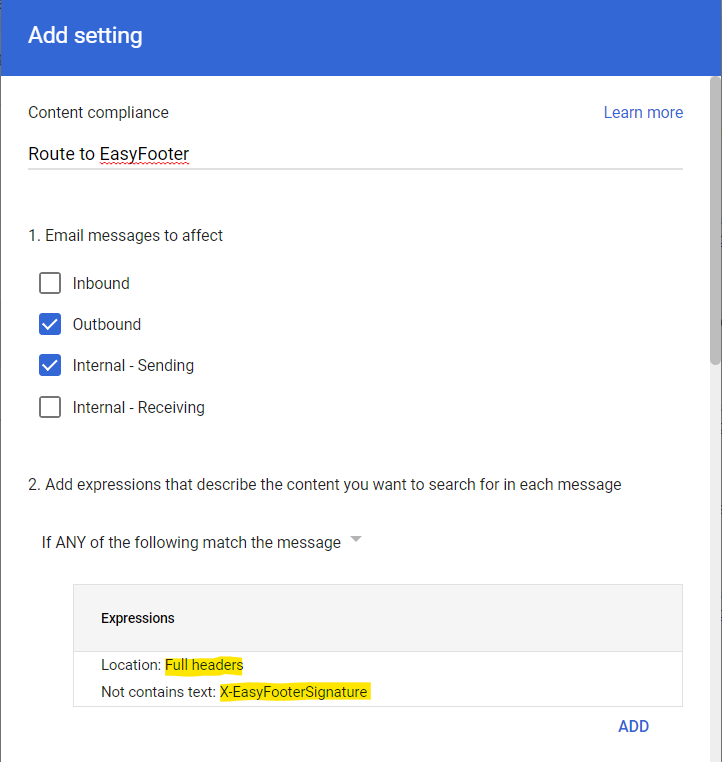
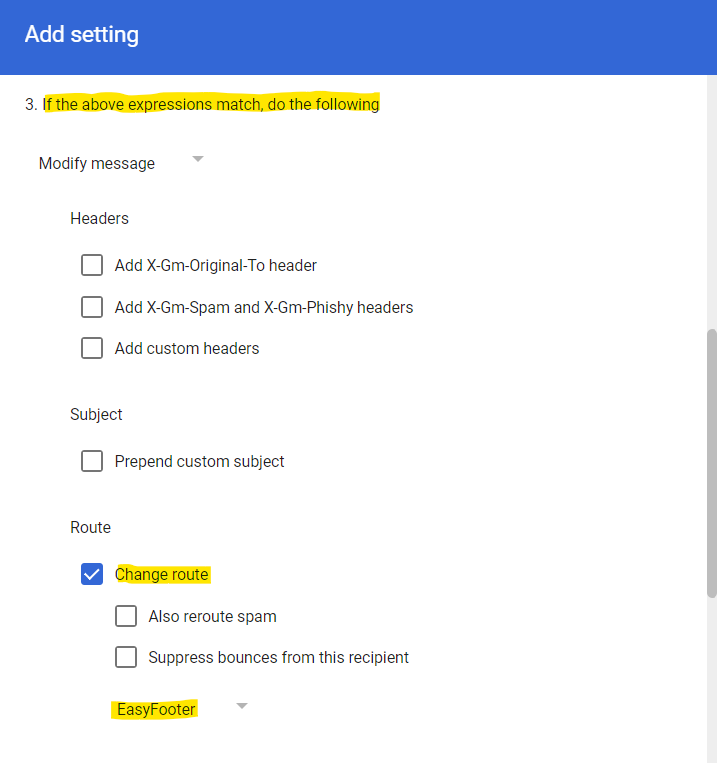
Scroll down to If the above expressions match, do the following section, and set the following:
- In Route, select Change Route.
- From the Normal Routing drop-down list, select the EasyFooter route.
- In Encryption (onward delivery only), check Require secure transport (TLS)
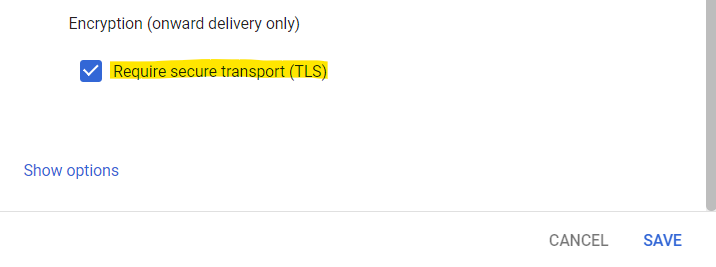
Click SAVE
3a. Limit routing to specific user or groups (optional)
Follow these steps to route your emails to EasyFooter cloud for a specific users or groups only.
This step is optional, if not configured, emails for all users are routed to EasyFooter cloud.
Scroll to the bottom of the Add setting window and select Show options:
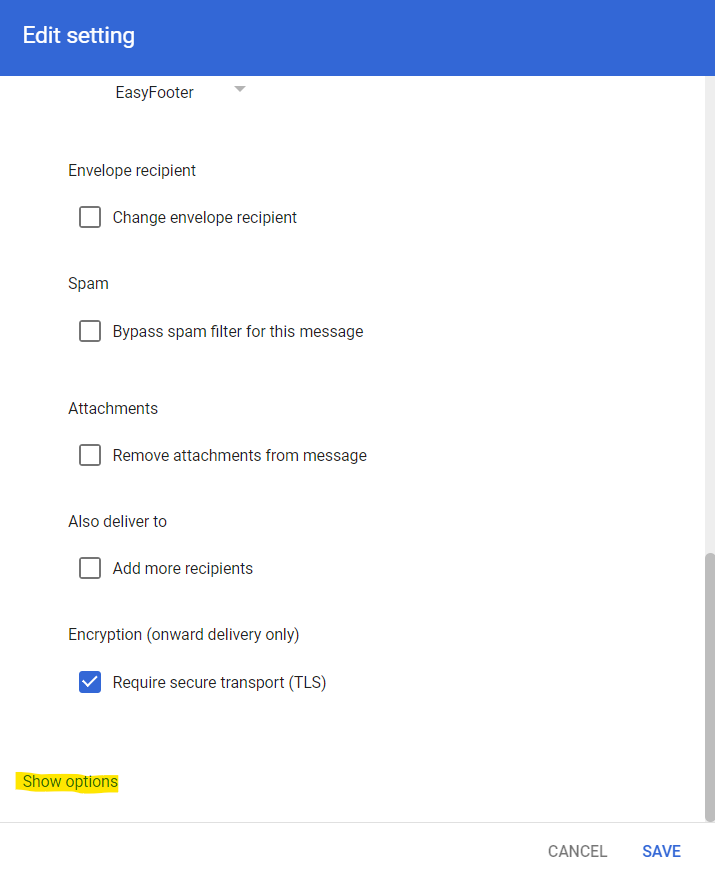
Select following options to limit routing to a specific user or group
- In the Account types to affect section select Users:
- In the Envelope filter drop-down, select Group membership (only sent mail) or Single email address.
- Enter single email address or click Select groups to select groups for whom signatures should be added:
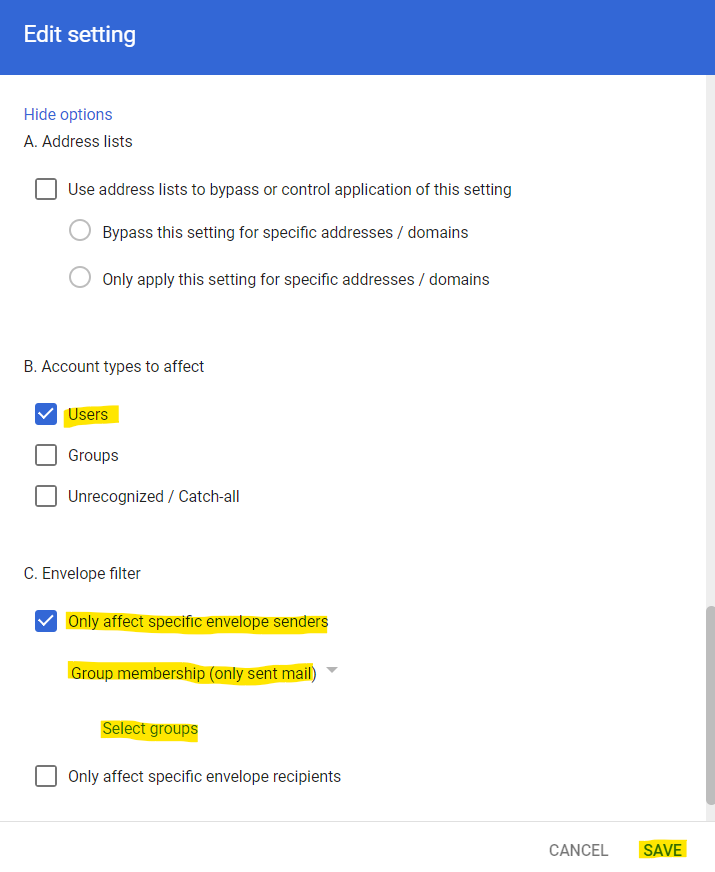
Click SAVE.
4. Define SMTP Relay
SMTP Relay allows EasyFooter to send emails back to Google after processing.
On the left side menu, select Apps then Google Workspace and Gmail
From the list of all Gmail settings, scroll down and expand Routing:
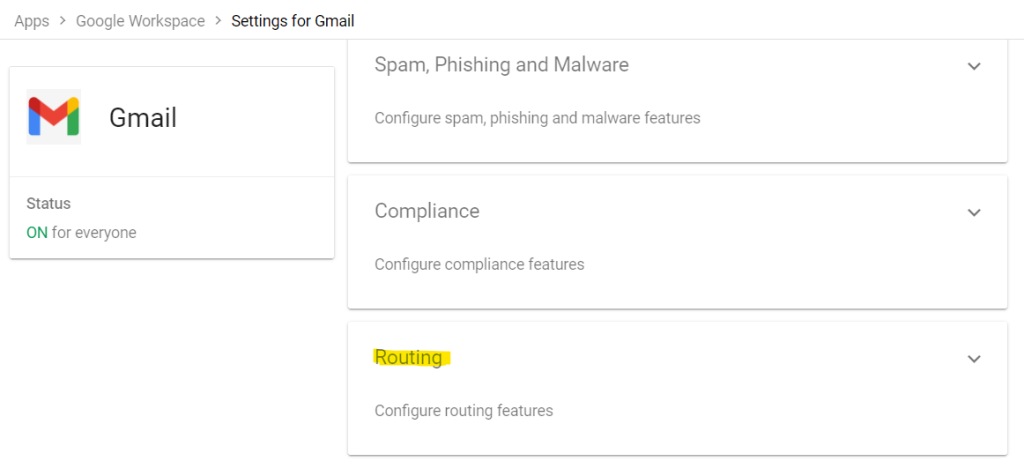
Scroll down to SMTP relay service and click CONFIGURE:

The Add setting window is displayed.
- In the SMTP relay service window, enter Route from EasyFooter
- In the Allowed Senders drop-down, select Only addresses in my domains
- In the Authentication section, select Only accept mail from the specified IP addresses
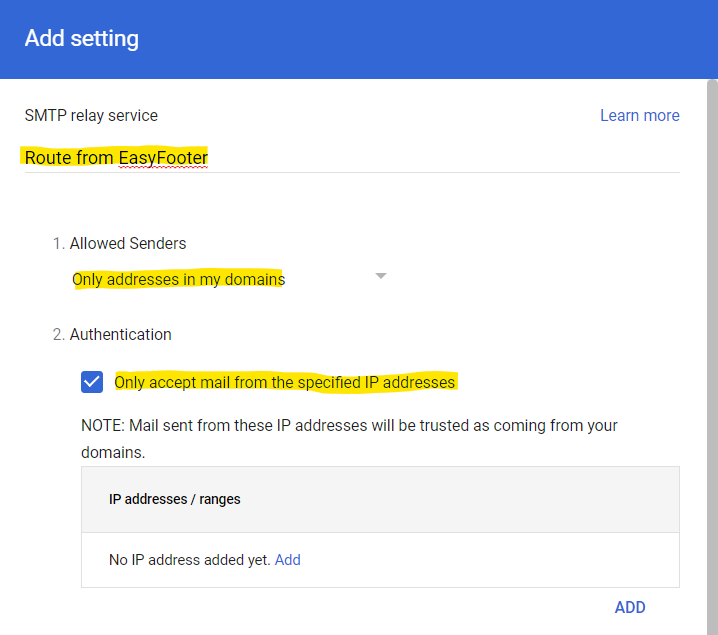
Click Add to provide EasyFooter addresses:
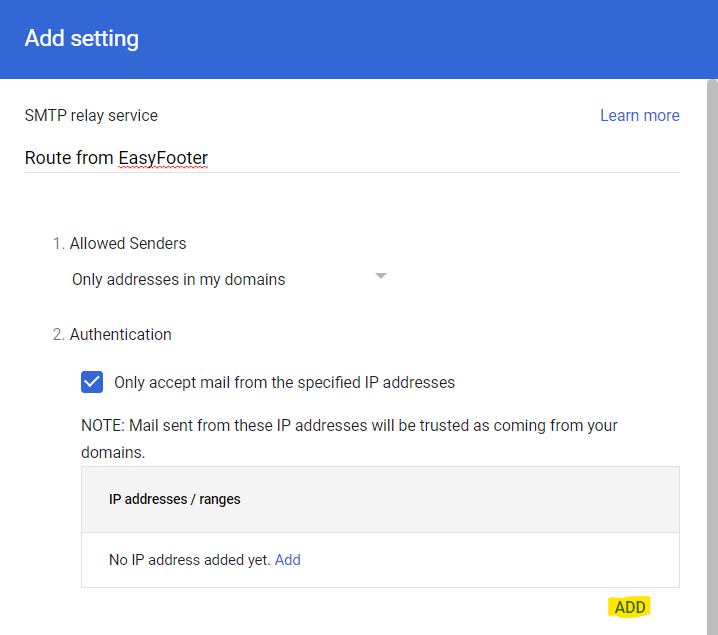
The Add setting window is displayed.
- In Description, enter EasyFooter
- In Enter IP address/range, enter the EasyFooter SMTP IP (as displayed on the EasyFooter portal interface/Configuration/EasyFooter SMTP IP Address).
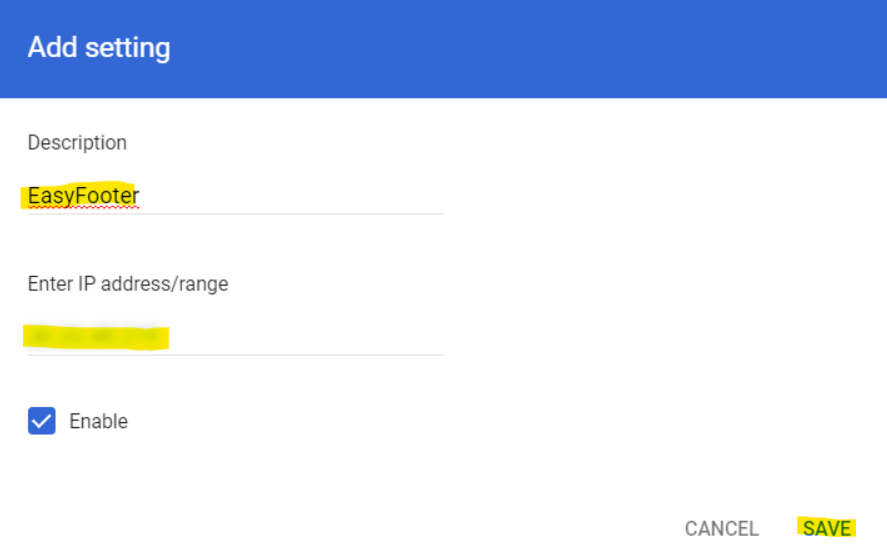
Click SAVE, you’ll return to the previous window.
- In the Encryption section, select Require TLS encryption.
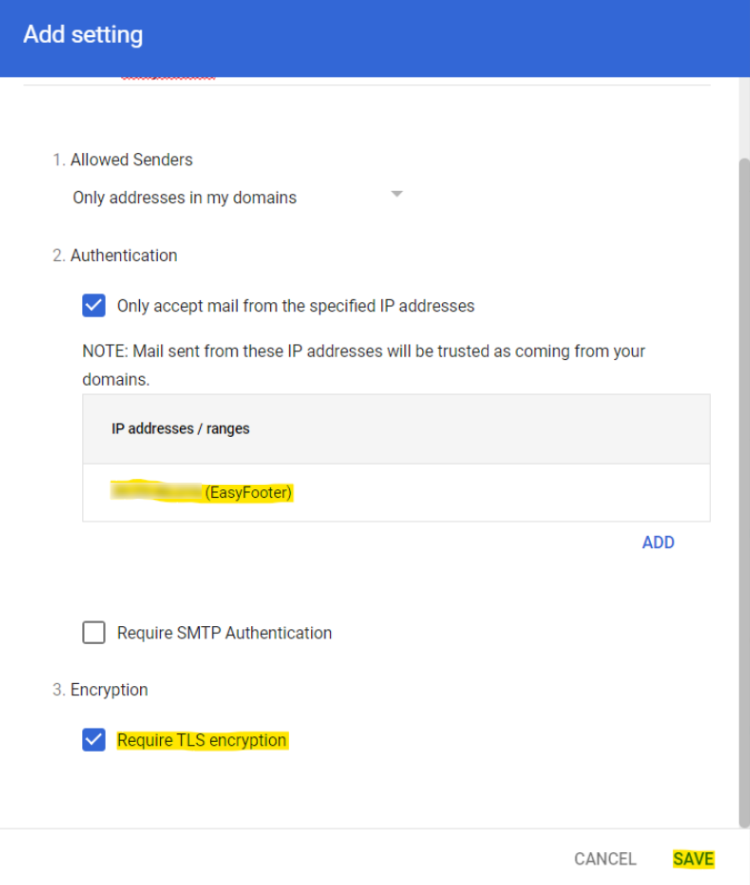
Click SAVE.
Congratulations! You have successfully configured EasyFooter email flow in your organisation.
You should configure your Sender Policy Framework (SPF) records now, to avoid your messages being marked as spam.